Two Machines, One Good Screen: The Quiet Downgrades of Cheap KVM Switches
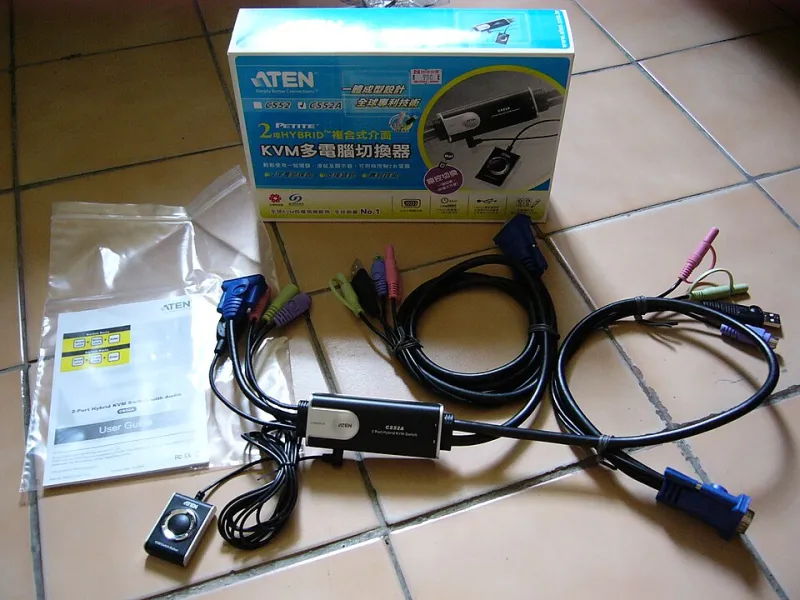
Photo: Solomon203, CC BY 3.0, via Wikimedia Commons
There is a particular kind of disappointment that arrives the moment you press the button on a cheap KVM switch. You have a good monitor, a work laptop and a home PC, and you have decided that one screen should serve both. The switch clicks over. The picture appears. And then you notice that the desktop feels slightly less crisp, the colours look a bit flat, or the refresh rate has dropped from something pleasant to something merely acceptable.
The monitor is not necessarily the problem. Nor is the laptop. More often, the weak link is the little box sitting between them, promising to share a keyboard, mouse and display but quietly making decisions about what your screen is allowed to receive.
The promise versus the pipe
A KVM switch is not just a button that moves a picture from one computer to another. It is an active piece of electronics handling video, USB and sometimes audio. Every signal passing through it consumes bandwidth, and every budget model has to make compromises somewhere. The question is whether those compromises are spelled out clearly or hidden behind a cheerful "4K compatible" sticker.
The first trap is video bandwidth. DisplayPort and HDMI have different generations, and a cable or switch that supports 4K at 60Hz may not support 4K at 120Hz, HDR or 10-bit colour at the same time. Some cheaper switches advertise 4K but rely on chroma subsampling, often written as 4:2:0, which reduces colour detail to keep the data rate down. Text can still look sharp enough, but fine colour edges and HDR highlights suffer. If you have bought a monitor for photo editing, video work or even just a good Netflix evening, that matters.
HDR is another frequent casualty. A switch may pass a standard dynamic range image perfectly well but strip or mishandle HDR metadata. The result is not always a black screen. Sometimes it is just a picture that looks oddly washed out, with the HDR toggle in Windows or macOS behaving as if it is doing something useful when it is not.
Refresh rate, VRR and the numbers that matter
Refresh rate is where many buyers first notice trouble. A monitor capable of 144Hz may fall back to 60Hz through a cheap switch, and the operating system may not make the reason obvious. Variable refresh rate, whether FreeSync or G-Sync compatible, is even more fragile. Some switches pass it; many do not. If gaming is part of the plan, check that the switch explicitly supports VRR at the resolution and refresh rate you intend to use.
The spec sheet is your friend, but only if you read it like a sceptic. Look for the exact combination: 4K at 60Hz with 4:4:4 chroma and 10-bit colour, not just "4K". Check the DisplayPort and HDMI versions. Look for Display Stream Compression support if you are pushing high refresh rates over a single cable. Check HDCP support, especially if you watch protected content from a streaming service, because a cheap switch can turn a perfectly legal film into a black screen with an error message.
USB is the other half of the story. Many KVMs include a USB hub for your keyboard, mouse and maybe a webcam. Cheap models often share a single USB 3.0 link between both computers, which is fine for a keyboard but less fine for a portable SSD or a 4K webcam. If you need fast storage or a decent dock, check whether the USB ports are truly USB 3.2 Gen 1 or better, and whether they remain available when you switch computers.
Docks are not automatically better
A USB-C dock can be a neater solution than a traditional KVM, especially for laptops. But docks have their own tax. Some rely on DisplayLink compression, which can be fine for office work but less ideal for colour-critical tasks. Others split bandwidth between video, Ethernet and USB, so a 4K display may drop to 30Hz when you plug in an external drive. The same sceptical reading applies: find the exact video mode supported while everything else is connected.
Cables deserve a mention too. A switch that supports high bandwidth can still be let down by the cable in the box. Short, certified cables are less exciting than a new monitor, but they are cheaper than replacing a screen because you assumed the free cable was up to the job.
A simple test routine before the returns window closes
UK buyers usually have a short window to change their minds, so test the setup properly in the first few days. Keep the boxes. Connect both computers, then check the display settings in your operating system rather than trusting the switch's indicator lights.
Start with the basics: confirm the resolution and refresh rate are what you expect. Open a test pattern or a high-resolution photo and look for colour banding or soft text. Toggle HDR on and off and see whether the picture genuinely changes. Try a protected streaming clip to check HDCP. Plug in a USB drive and check the transfer speed, then test the webcam and microphone if you use them. Switch back and forth several times, including while the machines are asleep, because wake-from-sleep behaviour is where cheap switches often stumble.
If something is wrong, change one variable at a time: cable, port, switch mode, operating system setting. That way you can tell whether the fault lies with the switch, the cable or the computer. And if the switch cannot pass the full signal your monitor was bought for, send it back. A good monitor should not be made mediocre by a box that costs less than a decent cable.
The KVM tax is rarely a single dramatic failure. It is a collection of small downgrades that add up to a screen which no longer does what you paid for. Read the small print, test the thing properly, and insist that one good monitor stays good when it is shared.